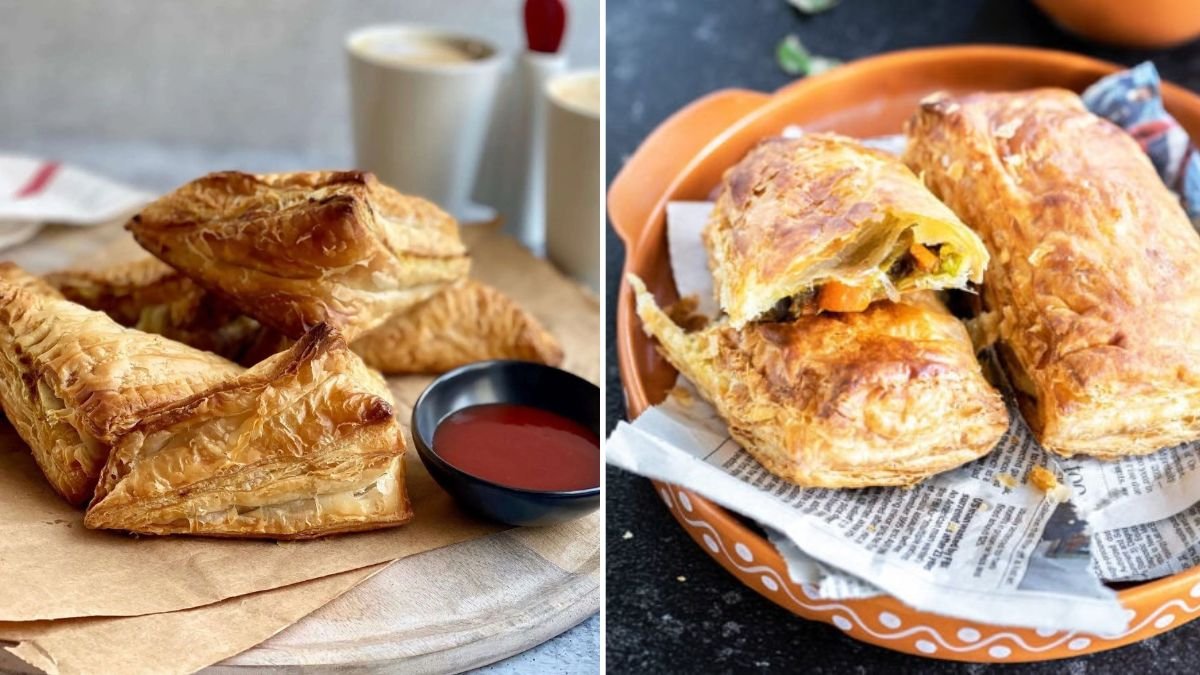
Halloween is all about imagination — and what better way to showcase that creativity than through fun, spooky, and delicious food? Forget the usual sweets and candy; this year, surprise your guests with something savory, flaky, and full of charm — Witch Hat Veg Puff Pastries!
These crispy, golden delights are shaped like witch hats, filled with flavorful vegetables, and baked to perfection. Whether you’re throwing a haunted house party, preparing a festive appetizer for family night, or hosting a potluck with friends, these pastries will cast a spell on everyone who tries them.
Ready to make magic in the kitchen? Follow this 5-step guide to crafting the ultimate Witch Hat Veg Puff Pastries — a Halloween treat that’s equal parts spooky and scrumptious.
Why You’ll Love Witch Hat Veg Puff Pastries
Before we jump into the recipe, let’s talk about why these pastries deserve a spot on your Halloween menu.
- Festive and Fun: Their witch-hat shape fits perfectly with the Halloween theme.
- Kid-Friendly: Both making and eating them is an exciting activity for kids.
- Customizable: You can switch up the fillings — from cheesy veggies to spicy beans or tofu.
- Make-Ahead Friendly: You can prepare them ahead of time and bake right before serving.
- Perfect for Parties: Bite-sized, flaky, and portable — the ideal Halloween appetizer!
Ingredients You’ll Need
Here’s everything you’ll need to bring these magical pastries to life.

For the Puff Pastry:
- 1 sheet frozen puff pastry, thawed (or homemade if you’re adventurous)
- 1 tablespoon all-purpose flour (for dusting)
- 1 egg, beaten (for egg wash; use milk for a vegetarian version)
For the Veggie Filling:
- 1 tablespoon olive oil
- 1 small onion, finely chopped
- 2 cloves garlic, minced
- ½ cup bell peppers, chopped (mix red, yellow, and green for color)
- ½ cup corn kernels (fresh or frozen)
- ½ cup spinach, finely chopped
- ½ cup boiled potatoes, mashed
- ½ teaspoon salt
- ¼ teaspoon black pepper
- ¼ teaspoon smoked paprika or chili flakes (optional)
- ½ teaspoon Italian seasoning
- ¼ cup shredded cheese (cheddar or mozzarella)
For Decoration (Optional but Fun):
- Black sesame seeds (to mimic the witch hat texture)
- A few chive strands or thin carrot strips for ribbons
- Small pieces of olive or tomato for “witchy accents”
Pro Tip: You can also make a vegan version using dairy-free puff pastry and vegan cheese.
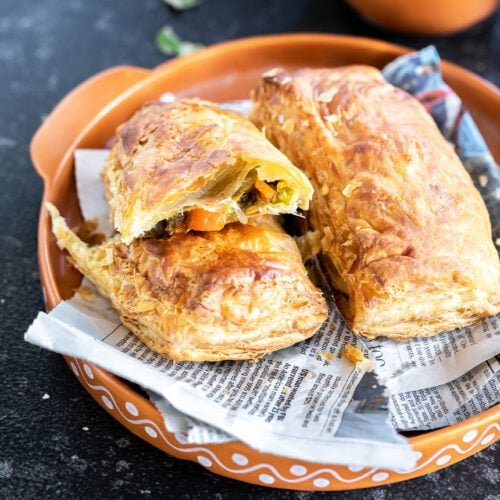
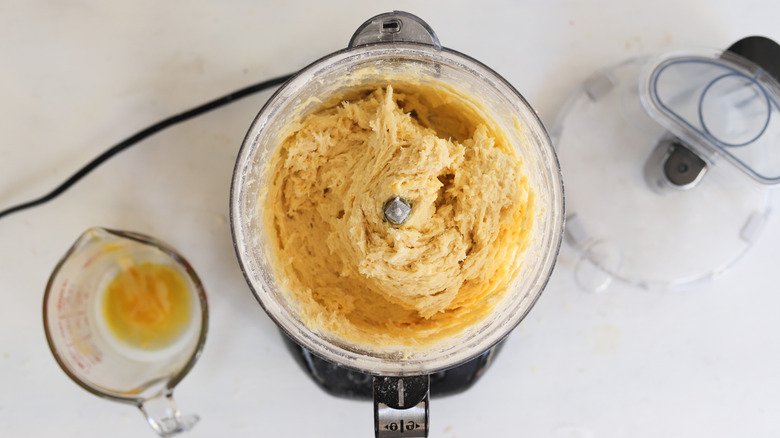
Step 1: Prepare the Magical Veggie Filling

Every good witch knows that the secret to a great spell — or snack — lies in the potion you brew. In this case, that’s your savory vegetable filling.
- Heat olive oil in a skillet over medium heat.
- Add chopped onion and garlic, and sauté until golden and fragrant.
- Add bell peppers, corn, spinach, and mashed potatoes. Stir and cook for 3–4 minutes.
- Season with salt, pepper, paprika, and Italian herbs. Stir well.
- Remove from heat and let the mixture cool slightly before adding shredded cheese.
This filling is hearty, colorful, and flavorful — the perfect balance to the crisp puff pastry shell. You can even prepare it ahead of time and store it in the fridge for up to a day.
Step 2: Roll Out and Cut the Puff Pastry
Now it’s time to shape your witch hats!
- Lightly dust your countertop with flour and roll out the puff pastry sheet to about ⅛-inch thickness.
- Using a round cookie cutter or the rim of a glass, cut out 8–10 circles (these will form the hat base).
- Then, cut triangular pieces from the remaining dough — these will be the top “pointy” parts of the hat.
Each pastry will use one circle and one triangle. The circle forms the hat’s brim, and the triangle becomes the cone.

Pro Tip: If you want more dimension, gently curl the base of the triangle to make the hat look whimsically bent — like a real witch’s hat!
Step 3: Assemble the Witch Hat Pastries
This is where the fun begins — time to bring your hats to life!
- Place a spoonful of the veggie filling in the center of each pastry circle. Don’t overfill — a teaspoon or two is plenty.
- Brush the edges of the circle with egg wash (or milk).
- Take one pastry triangle and gently press it over the filling, aligning the base with the circle’s edge.
- Press the edges firmly to seal and form a witch-hat shape.
- Use a fork to crimp the edges, ensuring no filling escapes during baking.
Optional: Sprinkle black sesame seeds on top for a “dark, witchy texture.”
If you’re feeling artistic, use a thin chive or carrot strip to tie around the “hat” like a ribbon — it adds a delightful touch of color and detail.
Step 4: Bake Until Golden and Crispy
Now that your witch hats are ready, it’s time to let the oven work its magic.

- Preheat your oven to 400°F (200°C).
- Line a baking sheet with parchment paper and arrange the assembled pastries, leaving space between each.
- Brush the tops with the beaten egg or milk for a glossy finish.
- Bake for 15–20 minutes or until the pastries puff up and turn golden brown.
The aroma that fills your kitchen will be enchanting — buttery pastry and savory veggies mingling to perfection.
When they’re done, remove them from the oven and let them cool slightly. The filling will be piping hot inside, so resist the urge to take a bite right away (even witches need patience!).
Step 5: Add Finishing Touches and Serve

Presentation is key — especially for Halloween. Once your Witch Hat Puff Pastries are cool enough to handle, it’s time to get creative!
- Add ribbons: Tie thin chive strands or carrot strips around the hat base.
- Create spooky eyes: Use small olive pieces or peppercorns for a playful monster effect.
- Serve with dips: Pair with spooky sauces like “Blood Red” ketchup, “Green Slime” guacamole, or “Pumpkin Magic” cheese dip.
Arrange the pastries on a dark platter or wooden board for a rustic Halloween look. Add a few cobweb props or plastic spiders to complete the spooky vibe.
Your Witch Hat Veg Puff Pastries are now ready to charm every guest at your Halloween gathering!

Tips for Perfect Witch Hat Puff Pastries
- Keep the pastry cold: Warm puff pastry can turn sticky and lose its flakiness. Work quickly or chill it between steps.
- Seal well: Make sure the edges are sealed tightly to prevent the filling from oozing out.
- Avoid soggy bottoms: Let the filling cool before adding it to the pastry.
- Add a spooky twist: Use food coloring (like black sesame powder or edible charcoal) for darker pastry hats.
- Freeze for later: Assemble and freeze unbaked pastries for up to a month — bake straight from frozen when needed!
Serving Suggestions for Halloween
These witch hat pastries make an excellent addition to your Halloween snack table. Pair them with other spooky-themed dishes for a complete spread:
- Goblin Guacamole with Veg Chips — a healthy green dip to balance the pastry.
- Creepy Corn Soup — warm, smoky, and comforting.
- Pumpkin and Kale Salad — adds color and freshness to your menu.
- Spider Web Brownies — for a sweet finale.
You can also pack them in lunchboxes or serve them as an after-school treat leading up to Halloween — kids will love their fun shape and tasty filling.
Why This Recipe Works
The combination of buttery puff pastry and savory vegetable filling creates a delightful texture contrast — crispy on the outside, soft and flavorful inside. The witch-hat shape adds a touch of Halloween magic, making it both a feast for the eyes and the palate.
These pastries are also customizable — switch up the filling based on your mood or what you have in the fridge. Try mushrooms, peas, or paneer for a twist, or go cheesy for an extra indulgent version.
Plus, they’re baked, not fried, which means less mess and guilt-free enjoyment.

Final Thoughts: A Spooky Yet Sophisticated Halloween Snack
With this 5-Step Guide to Making Witch Hat Veg Puff Pastries, you’ll have a Halloween snack that’s festive, flavorful, and full of personality. They’re easy to make, impressive to serve, and guaranteed to disappear fast — as if bewitched!
Whether you’re hosting a grown-up cocktail party or a fun kids’ gathering, these pastries hit the perfect balance between spooky and sophisticated. Pair them with themed dips and spooky décor for a truly enchanting Halloween experience.
So grab your rolling pin and a little Halloween spirit — it’s time to bake up some magic. One bite of these Witch Hat Puff Pastries, and your guests will be spellbound!